Go to footer

Moxie Teen eye replacement tutorial

Patient enough to take us step-by-step through a how-to? Well post it here!

Moxie Teen eye replacement tutorial

Postby Linteia » Wed Jun 22, 2011 12:04 pm

Someone asked to see how I switched out Kailey's eyes, so here goes.

What you'll need:
Your doll
Pocket knife
X-acto knife
Tweezers (one or two pair)
Eyes (I used Glib 14mm)
Eye adhesive of some kind


First step: Cutting open your dolly's head.

Image

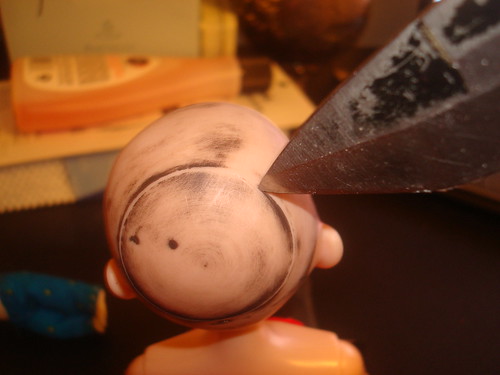
I used a pocket knife, but X-acto knives are more popular from what I've seen. I tried the X-acto knife and it really didn't work well, so I went with a sturdier knife. Right along the seam was a sweet spot that cut like butter when I found it.

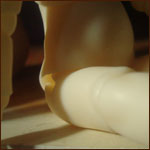
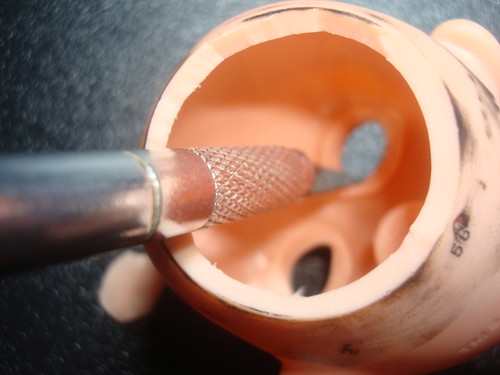
Second step: Removing the stock eyes.

Image

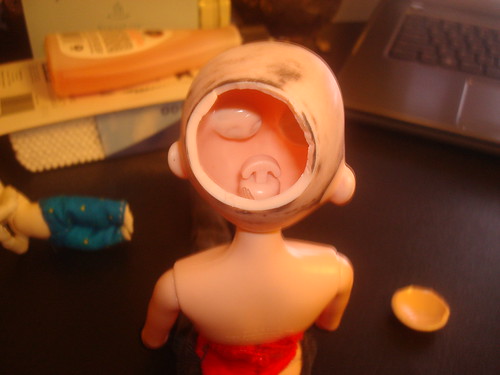
The inside of the head. Those little pockets are what hold her eyes in. Use an X-ato knife and cut them off (sadly not photographed, but there are after pictures)

Image

Something like that. Don't worry about scratching the eyes from behind, and I'll show you why.

Image

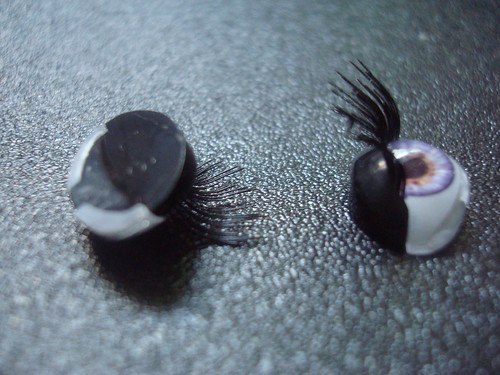
That black thing is a little plastic piece that holds the eyelashes, but it also covers the painted part at the back of the eye. Basically, even if you scratch it, you won't really damage the eye.

From here, it's was a lot of smoothing out the inner socket, checking with the new eye, and then carving out a little more in various places.

Step three: Inserting new eyes

Image

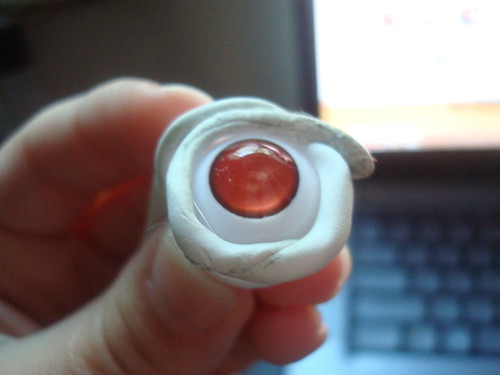
First I actually put the eye adhesive (in this case, poster putty) on the eye very close to the front. (I didn't want to pull her eyes out again to take a picture. I'm lazy :D)

Image

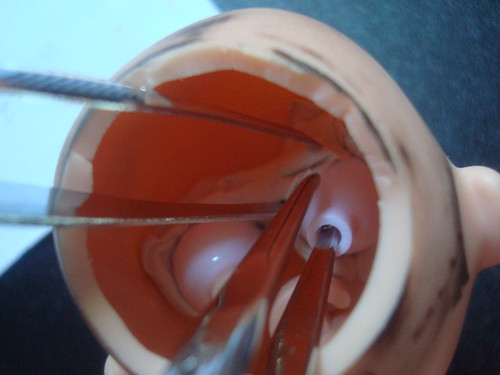
I inserted the eye with a pair of narrow tweezers and positioned it, then holding it by the peg I used a second pair of tweezers to tamp down the putty. I added more putty and used the other end of the tweezers to really get it firmly set in there.

Image

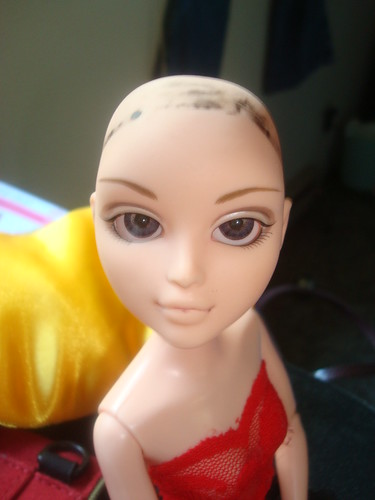
And voila! Kailey now has beautiful, adjustable eyes. :)

From my experience, I wouldn't go any larger than 14mm for eyes. Those red eyes were her originally intended ones, but at 16mm they wouldn't sit in the socket and there was barely room for the two of them side by side. :/
User avatar
Linteia
the walls have dolliehs
 
Posts: 588
Joined: Tue Jun 07, 2011 1:05 pm
Location: Tacoma, Washington, U.S. of A.


Re: Moxie Teen eye replacement tutorial

Postby landwhale » Wed Jun 22, 2011 1:07 pm

Thanks! The lashes are interesting on the default eyes. I wonder if you could reuse them on new eyes. What size did you use for her eyes? They look pretty big.
Obitsu 27cm Meryl, Lilly, Rhea, Stacey, Llywen, Lara, Aili
BJD Peyton (Non-official sculpt Happy D.I.M.), Un-named FL Chicline Lishe
RS/BBB Li(Ziili), Wu(Ba'ul), Yao. DikaDoll Rena(Lael)
CH Bisou Pepe (Charlie), CH Junior Ren (Allen), Obitsu 60cm Gretel (Cerise)
http://invie-alamode.blogspot.com/
User avatar
landwhale
Dolliehs Consume My Brains
 
Posts: 1001
Joined: Sun Jan 16, 2011 1:12 pm


Re: Moxie Teen eye replacement tutorial

Postby Linteia » Wed Jun 22, 2011 1:46 pm

I used 14mm acrylics. I tried 16mm (the red ones), but it really didn't fit at all. Which was a bummer, because they were perfect.

I tried prying the eyelashes out, but I couldn't get them to budge, maybe if someone more determined went at it, though. :P I didn't want to destroy the original eyes in case someday I found a use for them, so I didn't try very hard to remove the backing.
User avatar
Linteia
the walls have dolliehs
 
Posts: 588
Joined: Tue Jun 07, 2011 1:05 pm
Location: Tacoma, Washington, U.S. of A.


Re: Moxie Teen eye replacement tutorial

Postby delbelcoure » Sun Oct 16, 2011 7:32 pm

This is very helpful. I recently bought a MT girl and replacing her eyes has been on my agenda - now I know how.
http://www.flickr.com/photos/delbelcoure
Does this, will this, enhance my life or the lives of others?
-Don Aslett
Ack! I'm being overrun by Monster High dolls and frankendollies!
User avatar
delbelcoure
the walls have dolliehs
 
Posts: 862
Joined: Sat Mar 20, 2010 4:10 pm
Location: Ohio, USA


Re: Moxie Teen eye replacement tutorial

Postby djhirokun » Sat Oct 22, 2011 8:27 pm

Thanks for the tutorial. Good job on removing the paint on the scalp. Exactly what did you do to remove the paint without ruining the plastic? I just tried nail polish remover to be on the safe side and barely anything was removed.
Image
User avatar
djhirokun
i see dead dolliehs
 
Posts: 62
Joined: Tue Aug 02, 2011 1:10 pm
Location: San Antonio, Texas


Re: Moxie Teen eye replacement tutorial

Postby Linteia » Mon Nov 07, 2011 2:54 pm

djhirokun wrote:Thanks for the tutorial. Good job on removing the paint on the scalp. Exactly what did you do to remove the paint without ruining the plastic? I just tried nail polish remover to be on the safe side and barely anything was removed.


Most of it was done with super fine sand paper, but the hair lines were done with nail polish and time. Lots and lots of time. It worked best if I just let it soak for a while before scrubbing at it.
User avatar
Linteia
the walls have dolliehs
 
Posts: 588
Joined: Tue Jun 07, 2011 1:05 pm
Location: Tacoma, Washington, U.S. of A.


Re: Moxie Teen eye replacement tutorial

Postby magkelly » Wed Nov 09, 2011 3:41 pm

Forgive me for hijacking this thread but there is a much easier way to do this sans the hole in the head method. I've been changing up my MT and Liv dolls for a while in two ways.

First way is to use a Sharpie permanent highlighter. You have to think about your basic color mixing because what color you use will depend upon what you want to get. The Sharpie highlighters are transparent. It takes a steady hand but the highlighter can go over the colored iris and you can build it up to the depth of color you want. Once done, and dried it's pretty smear resistant but I also put some gloss acrylic over it to seal it when I was done. You want to stay away from the black pupil area but it works very well actually.

For instance I took my one Tristen and changed her eyes from purple to green with the green highlighter. They came out almost a peridot bottle green because of the hint of purple underneath. I did the same thing on a Melrose however and added some gold and blue highlighter as well and I got aqua green eyes out of it.

The other thing you can do is use transparent glass paint. I have used that on dolls with glass eyes before and that also works well. I use the one in the jars though, not the cheap stuff. That you can actually mix and seal like regular paint, but since it's transparent you can still see the doll iris through it. It's a bit more challenging than using highlighter but I got a more realistic effect using the glass paint actually.

Just a note, do NOT use non-permanent, non-Sharpie highlighters or the cheap deco glass paints for this. The former will smear and the latter is too thick for a good application. The glass paint that costs about $5 a jar is much better for this.

I'll post some pics for you all of my MT's later so you can see what I did if you like?

Hopes this helps some of you. I have opened the heads, but this is so much easier I think and it works if you're careful about it.
magkelly
Dolliehs Consume My Brains
 
Posts: 1047
Joined: Tue Nov 08, 2011 7:07 pm


Re: Moxie Teen eye replacement tutorial

Postby delbelcoure » Sat Mar 10, 2012 9:46 am

Thanks for this tutorial Linteia :) I really like how your MT looks with new eyes. I'm going to go dig through my eyes to see if I have any that will work.
magkelly- your technique sounds very interesting, thanks for posting it. I would love pictures. It would be great to be able to use the eyes I already have to get what I want. Have you tried regular sharpies on the eyes? That would give a whole 'nother range of colors.
I appreciate both these methods- thanks folks! I'm of to play with my dolls!
http://www.flickr.com/photos/delbelcoure
Does this, will this, enhance my life or the lives of others?
-Don Aslett
Ack! I'm being overrun by Monster High dolls and frankendollies!
User avatar
delbelcoure
the walls have dolliehs
 
Posts: 862
Joined: Sat Mar 20, 2010 4:10 pm
Location: Ohio, USA


Re: Moxie Teen eye replacement tutorial

Postby magkelly » Sat Mar 10, 2012 10:31 am

I did recently yes and it seems to work just fine though I prefer the highlighters. The regular pens are just a bit opaque for me, color builds up really fast and it's easy to overdo it, and I like the jewel tones I get from using the highlighters better. Sharpie puts out a neons pack every once in a while and I want to try those. They're basically just like the highlighters but there are more colors. Glass paint is nice though. You can some nice mixes going that route. I just had to try it and I am glad it works. I really hate cutting the doll heads. I know you can put a wig over the hole, but I just don't like it. Also, it's a lot less expensive than buying new doll eyes. I don't know that I'd go there for an expensive BJD but for cheap dolls like Liv or MT it's fine.
magkelly
Dolliehs Consume My Brains
 
Posts: 1047
Joined: Tue Nov 08, 2011 7:07 pm


Re: Moxie Teen eye replacement tutorial

Postby Teenzie » Tue Apr 02, 2019 7:16 am

Hey there,
Thanks so much for my account (activated just yesterday!).

I'm really interested in this page as I have a Teenz with one misaligned eye (and lots of Liv dolls with wonky eyes).

But first may I ask you all on the forum if it's just me, or are there others who can't see the images? Any idea what I can do about it if it's me?..

Secondly, I saw a youtube on how to swap Liv eyes without opening the head top and wondered if Teenz have the same eye system?
Could I possibly just heat up the head and when it's soft, push on the wrong eye (on the outside) to re-position it?
Or is it glued inside / fixed?

(The Liv tutorial btw swapped eyes but then the new eyes were left just as wonky, so not sure if it can be helped).

Many thanks for your tutorial here, and to all for any tips or remarks...
Teenzie
Dolliehs? WHERE???
 
Posts: 2
Joined: Mon Apr 01, 2019 8:33 am

Next

Return to Board index

Return to Tutorials

Who is online

Users browsing this forum: No registered users and 6 guests