Silicon Mold Making!
I figured that since I was remolding the lower arm on my boy... might as well take photos and let people know some of the 'secrets' to resin doll making. Truth be told, making a resin doll is easy, making one WELL is the hard part.
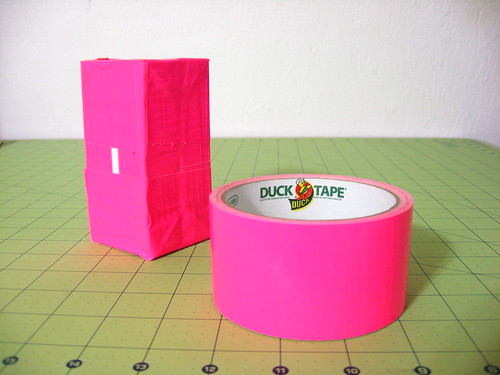
When making a mold box, things to keep in mind. Have at least .25 inches on all sides of your object, with .75 where your pour spouts and air vents will go. Silicon is expensive, duct tape isn't... when in doubt on water-tightness of the box, apply more duct tape. I've lost good silicon and boxes due to seams splitting, now I never skimp on the duct tape.
I personally like to have cute molds, so when possible, Flamingo Pink is the duct tape color of choice. ^___^
I also buy silicon by the gallon. It's about $100. Silicon molds do wear out, so I like having the extra on hand for when one of my molds dies on me.
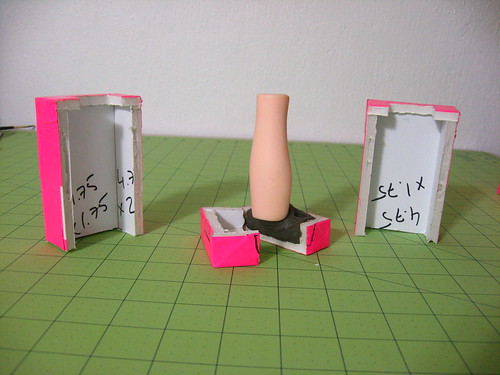
Since I'm insane, the mold I'm making is a weird hybrid of a one part, and two part with interlocking parts. As I said, I'm insane. I tend to keep on hand mold boxes for various pieces, so I can't show you that part of the process.
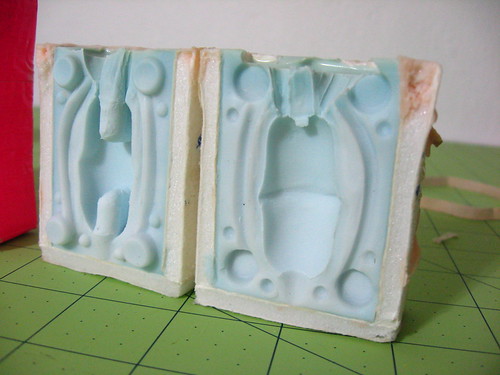
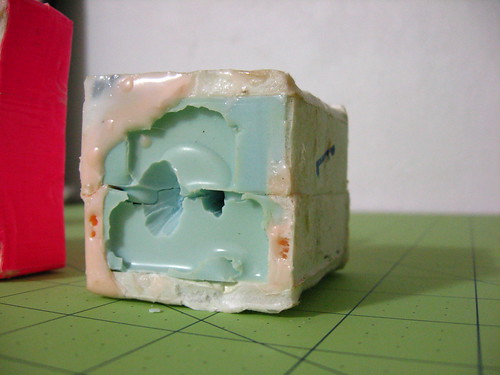
Okay, this is a normal two part mold. This is the one for my boy's elbow. Fairly simple and straight forward. Also quite evident that this one is being well used. ^.~
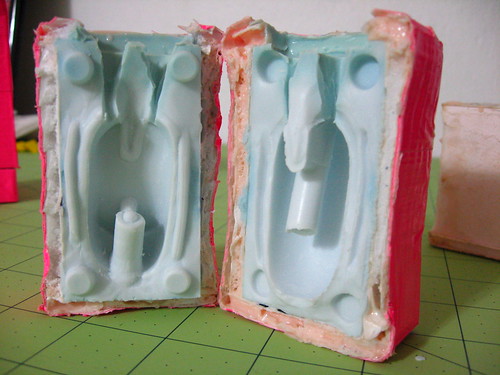
Here's the one that I made for the knee joint. It looks a little weird, because I made it with the intention of not having to drill this particular piece. The two funny looking parts that stick out will line up, and catch on each other so that the channel for the elastic is made while the piece is cast.
It's that inter-connectivity that I'll be going for on my current mold. I only need to almost horribly maim myself with a drill once to learn to work smarter instead of harder. XD
Some things to keep in mind while setting your piece up in the mold... pour spouts and air vents. You want both. Preferibly multiple air-vents. Trust me on this. On one of my molds I only left a pour spout, and then had to cut an air vent in so that I could keep a steady stream of resin going into the mold. The other thing, air bubbles. They are gonna happen. Find an orientation for your part that will minimize problems with air bubbles. Try to pour from narrow to wide, this will give the air less of a surface to adhere to... or, if your part has a side that you really don't care about the aesthetics on, make that the upper side.
Here's my mold being set up. Normally you don't chop the mold box up into this many parts... usually you want no more than two sides. But, for what I'm going to do to it, I needed that other side to be removable so that once the silicon is set, I can treat the main body like a one piece mold... and give it a slit down the side to make getting the resin part OUT less of a hassle once it's cast.
Most of my larger molds are made with a slit down the side for easy part removal. ^___^
Notice the 'hole' cut out of the top of the box. That is removed so that I can pour my silicon in.
You can see the mold 'keys' better here. These are to make sure that when the mold goes together, it fits together in the correct way and doesn't slide around causing slippage. This part doesn't have to be too pretty, just functional. Before any one asks, silicon IS sensitive enough to pick up finger-prints.
I don't have any pour spouts or air vents in yet. Those will be cut into the silicon after it's set. Sometimes it's easier to attach a dowel and let that be a faux spout while the mold is setting up. In this particular case, an exacto will do the trick.
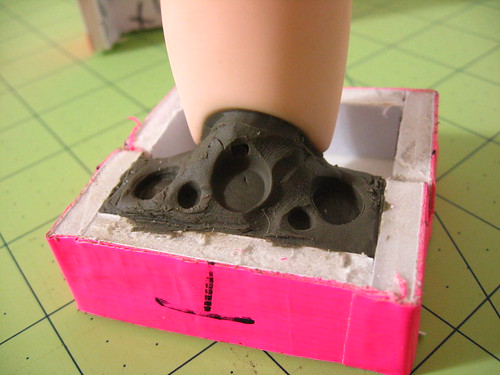
Not visible, but, there is another 'key' in there... so that when I put this mold together, this part will 'lock' with it's corresponding other half and no more drilling will need to be done on this piece. The only thing needed, will be normal clean-up. I know I'm excited.
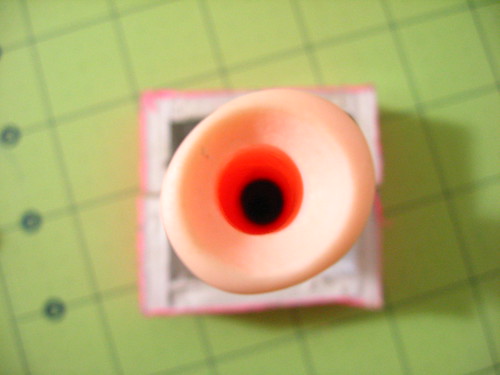
Now whip out a roll of eye-searingly pink duck tape, and close this puppy up! Get all the edges to seal up your mold. You want it to be 'water tight'. When in doubt, use more duck tape, it's cheap; silicon is expensive. Leave the top open. Silicon needs to be poured in there.
Also remember, there should be at the very *least* .25 inches of space around your part within the box and .75 where the pour spouts and air vents are/will be.
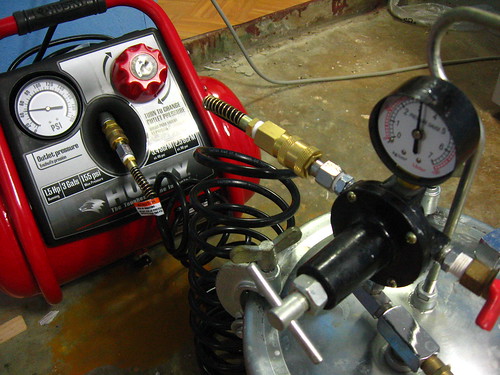
Gather everything you need for mixing and pouring silicon. Instead of degassing my silicon, I pop mine into the pressure pot once it's poured into the mold and let it set up under 45psi. It's a cheaper option than using a vacuum chamber. What this does is that it squeezes the bubbles out, making a mold that is usable for pressure casting.
Since my compressor is loud, I always make sure to use my protective headphones.
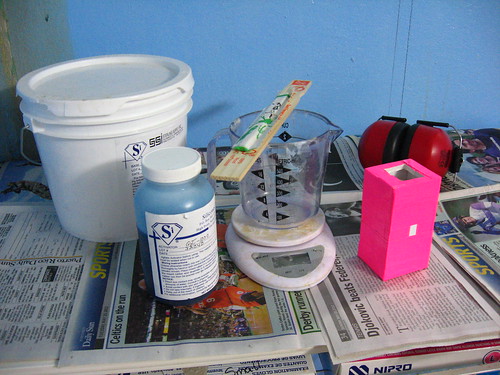
I get my silicon by the gallon. Just like resin and apoxy, it's a two part product. A med/large mixing cup. Digital scales tend to be better for this. Paint stirrer, and a set of chop sticks. Oh, make sure your mold is on hand.
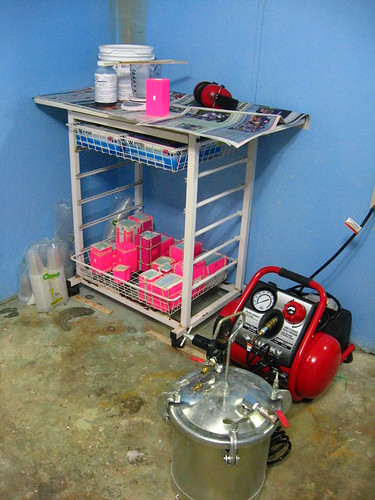
Where the magic happens in my studio.... Awesome, isn't it? Actually, it's a little scary looking. XD
All those little pink & blue boxes on the bottom basket, those are *most* of the molds for my Sweet Doll body. This is the table that normally gets used for my casting. I'm sure everyone was expecting a more grandiose setting for something like this. ^.~
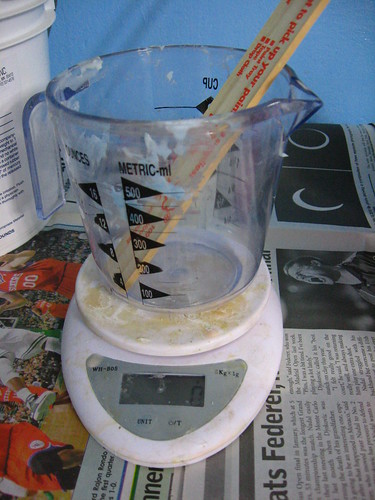
Set the measuring cup and paint stirrer on the scale. Zero it out. The reason for this is, you need the weight of the white 'goo' to determine how much of the catalyst to add. The ratio mine uses is 10:1. BUT! It's a pain in the keister to get the stirrer OUT, easier to leave it in the cup... and already have the weight 'negated' from the start.
The chopstick (disposable) is to scrape any excess off the paint stirrer into your measuring cup before getting more of the white side from the bucket. This isn't required, but it helps make the entire process cleaner by avoiding drips across the table.
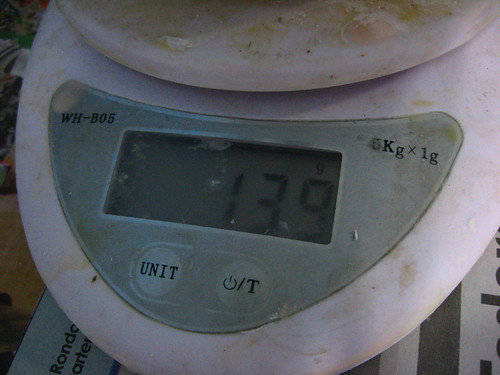
This is going to sound terrible, but, eyeball the amount of silicon needed. My mold is small, so I figured that I'd need about 1/3 of a cup. Since silicon takes so long to set up, if you misjudge, more can be mixed up quickly and added in. My amount ended up being about 140 grams. Which means I need to add a minimum of 14 grams. The more of the catalyst added, the quicker your mold will set up. That being the case, I tend to add 15%, which will be closer to 21grams.
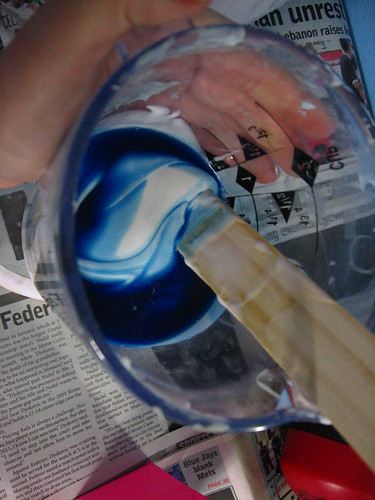
I forgot to take a shot of the white without any catalyst added. But, here's a shot of the catalyst being added. It smells like blue berries! FYI, this is totally the safest part of casting resin.
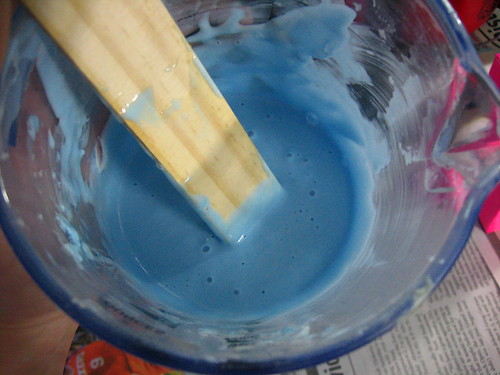
The silicon all nicely mixed. Because I add in 15-20% of the 'blue', mine usually turn out a darker blue than normal.
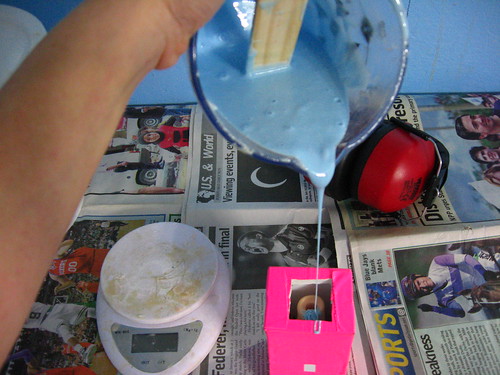
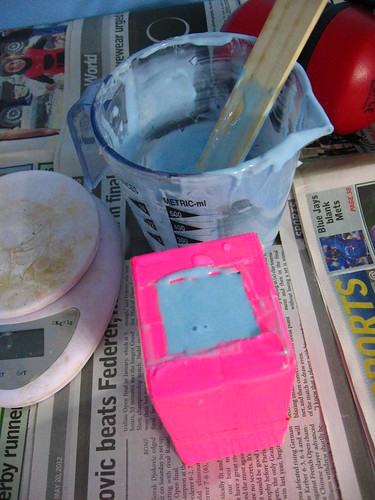
Now pour the silicon into your mold. Try to keep a thin stream going. This will help break any larger air bubbles in the silicon.
....apparently the silicon is the same color as my wall. o.0;;;
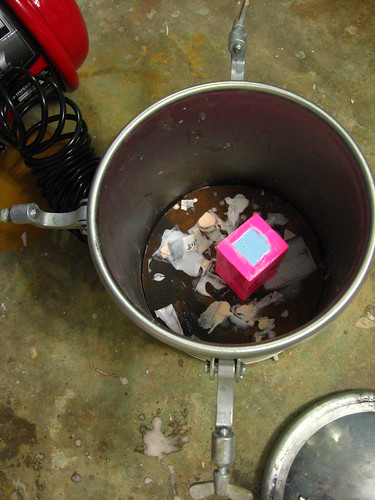
Once the mold is filled, pop it into the pressure pot. Clamp the lid on, and pump in 40-45psi for several hours!!! ^___^
I've had molds set up as quickly as 5hrs, and others that have taken over a day. Usually a good rule of thumb, is to check the left-over silicon in the measuring cup. If that's still sticky, then the stuff in the pot is *definitely* not set up yet.
I will post again once I've sprung the mold from the pressure pot and set the other half of the mold. ^.~
While waiting for the silicon to set up, I highly suggest playing with a kitten. My little guy, Dumas, has offered his services for being played with, and explicitly states that he will make sure that you are defended against ferocious leaves.


<3
-Kiki-chan78.
When making a mold box, things to keep in mind. Have at least .25 inches on all sides of your object, with .75 where your pour spouts and air vents will go. Silicon is expensive, duct tape isn't... when in doubt on water-tightness of the box, apply more duct tape. I've lost good silicon and boxes due to seams splitting, now I never skimp on the duct tape.
I personally like to have cute molds, so when possible, Flamingo Pink is the duct tape color of choice. ^___^
I also buy silicon by the gallon. It's about $100. Silicon molds do wear out, so I like having the extra on hand for when one of my molds dies on me.
Since I'm insane, the mold I'm making is a weird hybrid of a one part, and two part with interlocking parts. As I said, I'm insane. I tend to keep on hand mold boxes for various pieces, so I can't show you that part of the process.
Okay, this is a normal two part mold. This is the one for my boy's elbow. Fairly simple and straight forward. Also quite evident that this one is being well used. ^.~
Here's the one that I made for the knee joint. It looks a little weird, because I made it with the intention of not having to drill this particular piece. The two funny looking parts that stick out will line up, and catch on each other so that the channel for the elastic is made while the piece is cast.
It's that inter-connectivity that I'll be going for on my current mold. I only need to almost horribly maim myself with a drill once to learn to work smarter instead of harder. XD
Some things to keep in mind while setting your piece up in the mold... pour spouts and air vents. You want both. Preferibly multiple air-vents. Trust me on this. On one of my molds I only left a pour spout, and then had to cut an air vent in so that I could keep a steady stream of resin going into the mold. The other thing, air bubbles. They are gonna happen. Find an orientation for your part that will minimize problems with air bubbles. Try to pour from narrow to wide, this will give the air less of a surface to adhere to... or, if your part has a side that you really don't care about the aesthetics on, make that the upper side.
Here's my mold being set up. Normally you don't chop the mold box up into this many parts... usually you want no more than two sides. But, for what I'm going to do to it, I needed that other side to be removable so that once the silicon is set, I can treat the main body like a one piece mold... and give it a slit down the side to make getting the resin part OUT less of a hassle once it's cast.
Most of my larger molds are made with a slit down the side for easy part removal. ^___^
Notice the 'hole' cut out of the top of the box. That is removed so that I can pour my silicon in.
You can see the mold 'keys' better here. These are to make sure that when the mold goes together, it fits together in the correct way and doesn't slide around causing slippage. This part doesn't have to be too pretty, just functional. Before any one asks, silicon IS sensitive enough to pick up finger-prints.
I don't have any pour spouts or air vents in yet. Those will be cut into the silicon after it's set. Sometimes it's easier to attach a dowel and let that be a faux spout while the mold is setting up. In this particular case, an exacto will do the trick.
Not visible, but, there is another 'key' in there... so that when I put this mold together, this part will 'lock' with it's corresponding other half and no more drilling will need to be done on this piece. The only thing needed, will be normal clean-up. I know I'm excited.
Now whip out a roll of eye-searingly pink duck tape, and close this puppy up! Get all the edges to seal up your mold. You want it to be 'water tight'. When in doubt, use more duck tape, it's cheap; silicon is expensive. Leave the top open. Silicon needs to be poured in there.
Also remember, there should be at the very *least* .25 inches of space around your part within the box and .75 where the pour spouts and air vents are/will be.
Gather everything you need for mixing and pouring silicon. Instead of degassing my silicon, I pop mine into the pressure pot once it's poured into the mold and let it set up under 45psi. It's a cheaper option than using a vacuum chamber. What this does is that it squeezes the bubbles out, making a mold that is usable for pressure casting.
Since my compressor is loud, I always make sure to use my protective headphones.
I get my silicon by the gallon. Just like resin and apoxy, it's a two part product. A med/large mixing cup. Digital scales tend to be better for this. Paint stirrer, and a set of chop sticks. Oh, make sure your mold is on hand.
Where the magic happens in my studio.... Awesome, isn't it? Actually, it's a little scary looking. XD
All those little pink & blue boxes on the bottom basket, those are *most* of the molds for my Sweet Doll body. This is the table that normally gets used for my casting. I'm sure everyone was expecting a more grandiose setting for something like this. ^.~
Set the measuring cup and paint stirrer on the scale. Zero it out. The reason for this is, you need the weight of the white 'goo' to determine how much of the catalyst to add. The ratio mine uses is 10:1. BUT! It's a pain in the keister to get the stirrer OUT, easier to leave it in the cup... and already have the weight 'negated' from the start.
The chopstick (disposable) is to scrape any excess off the paint stirrer into your measuring cup before getting more of the white side from the bucket. This isn't required, but it helps make the entire process cleaner by avoiding drips across the table.
This is going to sound terrible, but, eyeball the amount of silicon needed. My mold is small, so I figured that I'd need about 1/3 of a cup. Since silicon takes so long to set up, if you misjudge, more can be mixed up quickly and added in. My amount ended up being about 140 grams. Which means I need to add a minimum of 14 grams. The more of the catalyst added, the quicker your mold will set up. That being the case, I tend to add 15%, which will be closer to 21grams.
I forgot to take a shot of the white without any catalyst added. But, here's a shot of the catalyst being added. It smells like blue berries! FYI, this is totally the safest part of casting resin.
The silicon all nicely mixed. Because I add in 15-20% of the 'blue', mine usually turn out a darker blue than normal.
Now pour the silicon into your mold. Try to keep a thin stream going. This will help break any larger air bubbles in the silicon.
....apparently the silicon is the same color as my wall. o.0;;;
Once the mold is filled, pop it into the pressure pot. Clamp the lid on, and pump in 40-45psi for several hours!!! ^___^
I've had molds set up as quickly as 5hrs, and others that have taken over a day. Usually a good rule of thumb, is to check the left-over silicon in the measuring cup. If that's still sticky, then the stuff in the pot is *definitely* not set up yet.
I will post again once I've sprung the mold from the pressure pot and set the other half of the mold. ^.~
While waiting for the silicon to set up, I highly suggest playing with a kitten. My little guy, Dumas, has offered his services for being played with, and explicitly states that he will make sure that you are defended against ferocious leaves.
<3
-Kiki-chan78.