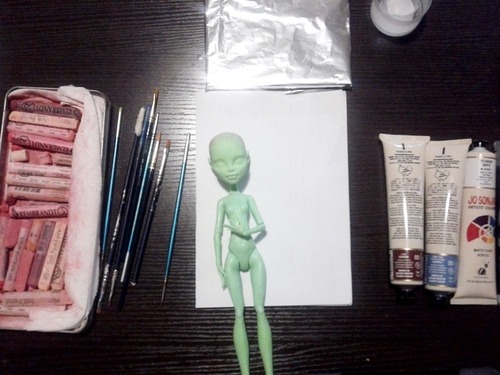
Go to footer

A face up tutorial from me.

Patient enough to take us step-by-step through a how-to? Well post it here!

A face up tutorial from me.

Postby Kd_Bunchanumbers » Tue Jul 09, 2013 10:04 am

So a lot of people have been angling for a tutorial from me and how I paint my dolls. However I don't really feel confident in my technique so I recommend you don't just use my tutorial as law, but rather a list of helpful suggestions to help you see how my technique works for me. So yeah, here is my tutorial.

Image

Supplies:
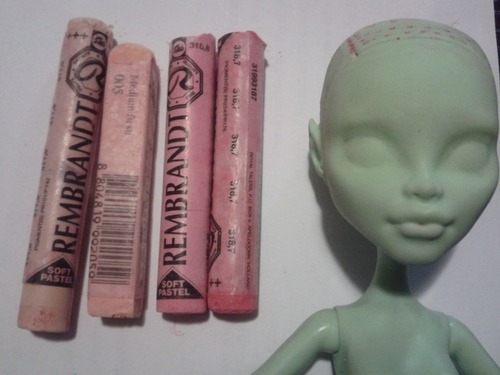
  • Chalk Pastels The brand I use is Rembrant and Gallery by Mungyo. I would recommend getting four pastels. The colours I used was a light beige, a medium flesh, soft pink and a darker pink. You could probably get away with using a beige and a pink, but I like a bit of variation.
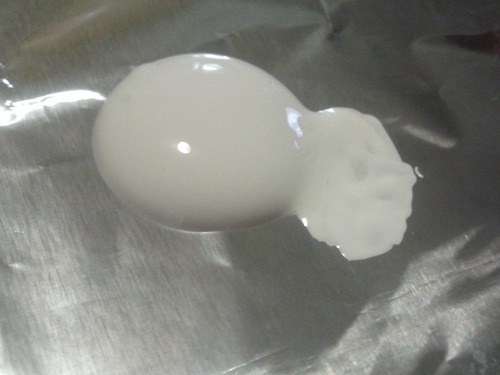
  • ACRYLIC Paint. The brand I use is Jo Son Ja's Artist's Colours, but I've used MANY brands of acrylic paints ranging from super cheap to super expensive. The paint that is more expensive will have more pigment in it, so you don't need to layer paint as much, but if you're starting out, a cheaper paint will do just fine. Do not use nail polish, enamel or oil paint. These will react badly with the vinyl and either stain, never dry, chip badly or all the above.
  • Paint brushes/makeup brushes. I say make up brushes for blushing, however the set I got was from the $2 store and they've held up since I don't soak them in water. For painting I recommend sinking money into fine detail brushes as they hold up to being used and cleaned more, they 'grip' the paint much better than cheaper brushes. Also the more finer the brush tip which is pretty important. This is the one area I do not recommend cheaping out on.
  • A palette. Since I'm cheap and lazy I use a CD case covered in foil. This means when I'm done with the paints i don't need to clean it I just take out the foil and chuck it out. Don't use paper as it soaks paint too quickly. 
  • A piece of paper for pastels. This can be any scrap paper. Recycle because it saves money and the environment.
  • Water. You'll be using it a lot.
  • A paper towel to clean your brush between paints
  • Sealer. I recommend MSC, but brush on acrylic sealer can be decent for just painted parts. Matte sealer will dry slightly shiny so don't use it to seal your blushing.

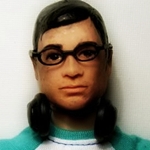
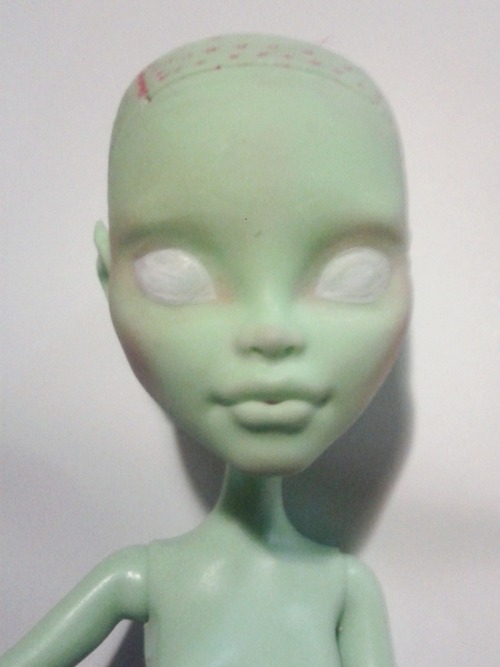
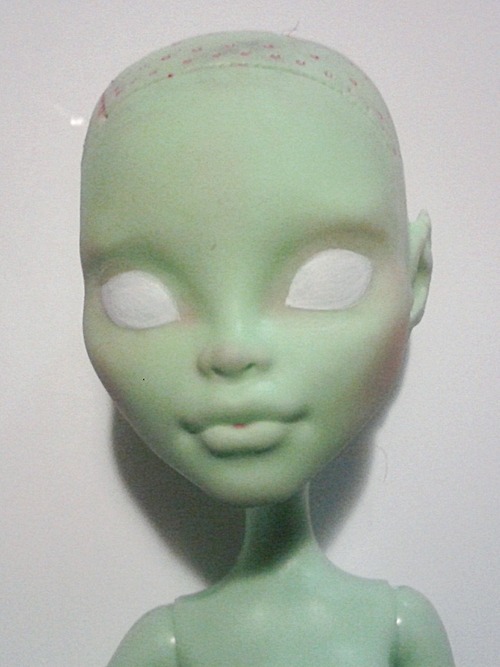
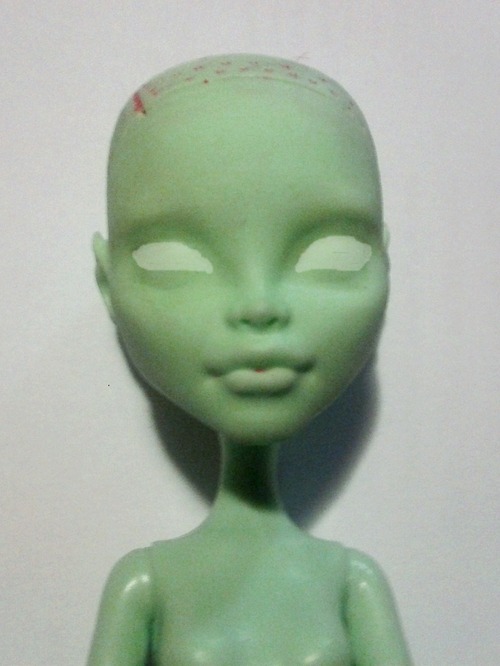
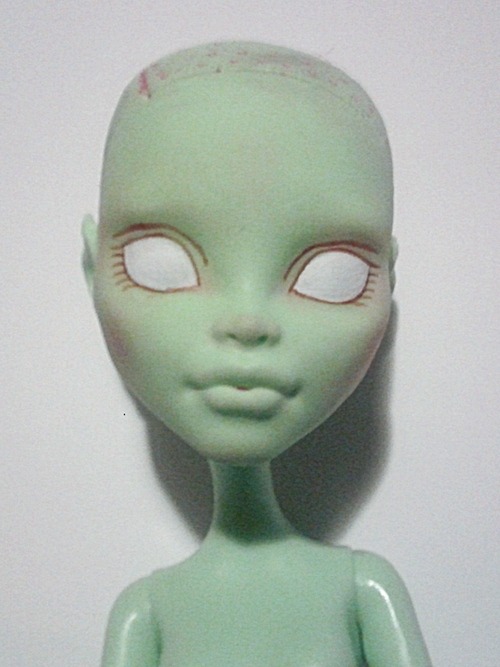
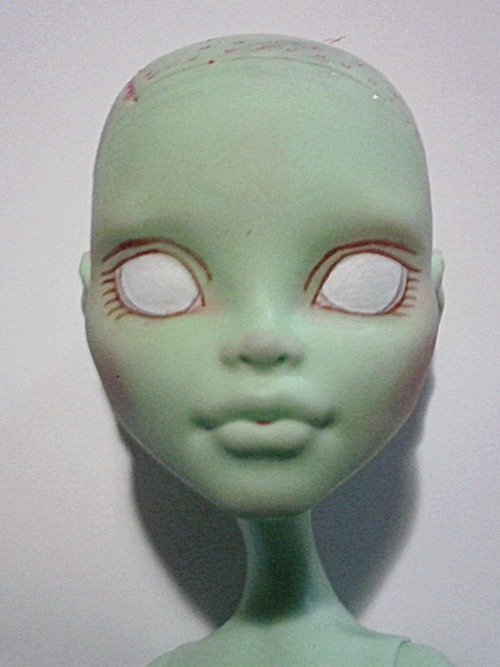
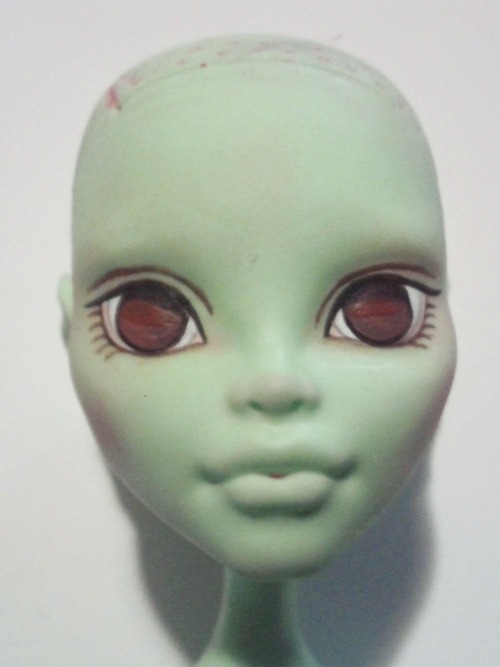
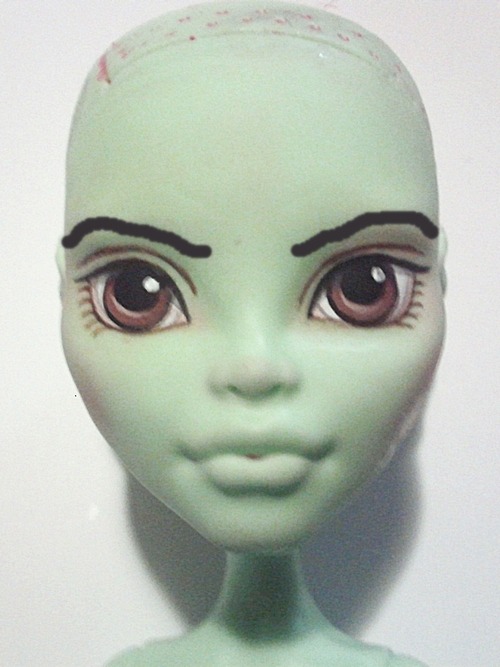
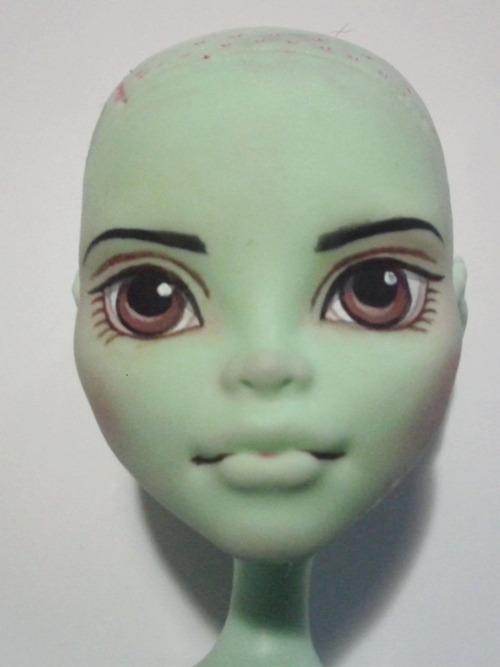
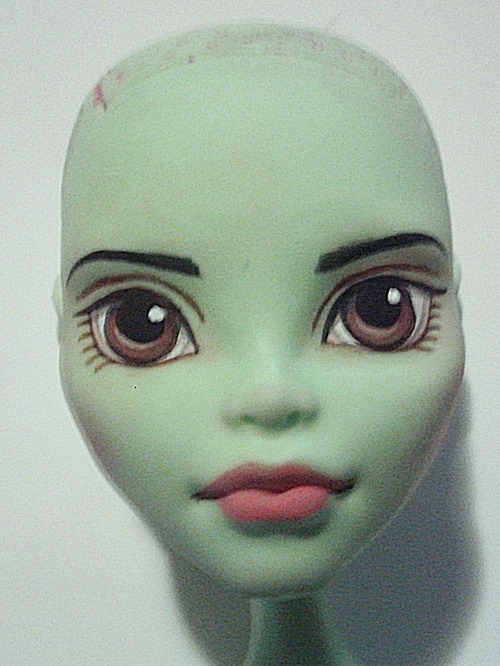
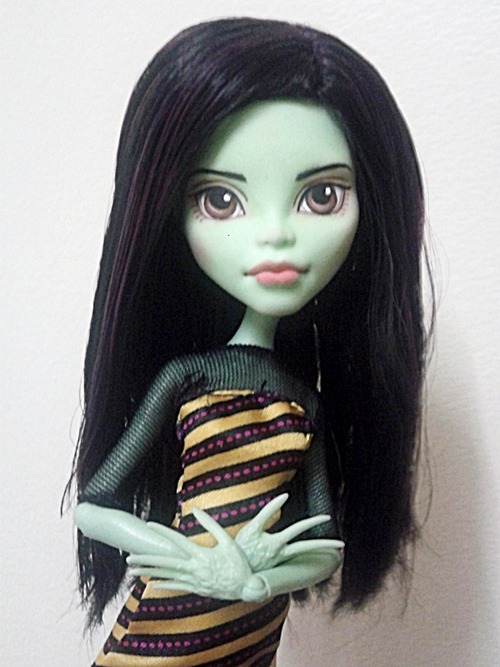
Step 1: To prep your doll, remove make up using acetone based nail polish remover, paint brush cleaner, Magic Erasers or pure acetone. Wash your doll to remove everything and pat it dry. If your doll has hair, STYLE the hair first or at least boil it to lay wear you want it, including fringes. This will make it easier to style it afterwards to your liking. Then wrap the hair in clear food wrap/saran wrap/cling wrap. To protect the hairline use masking tape.

Image


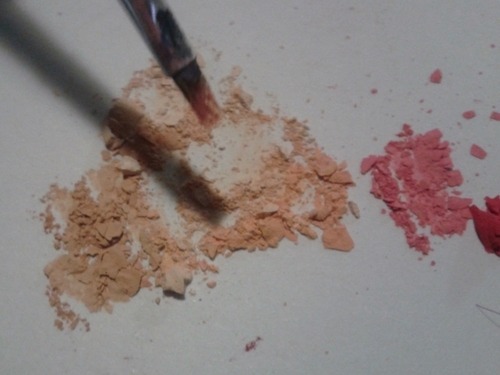
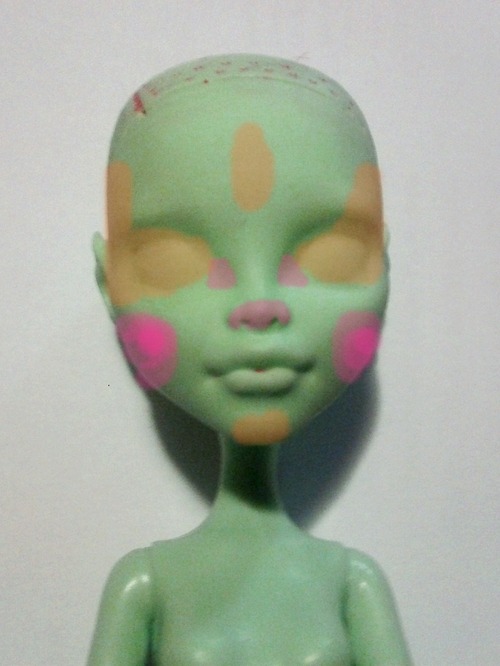
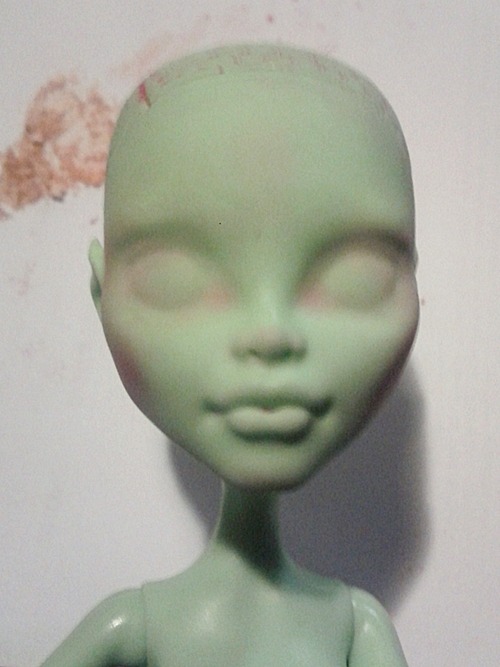
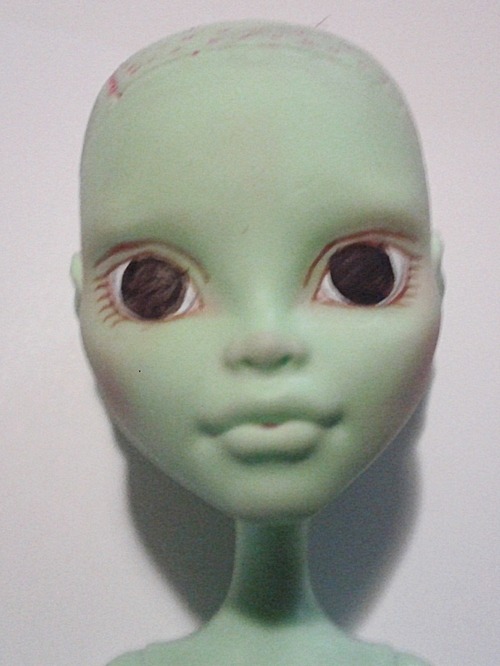
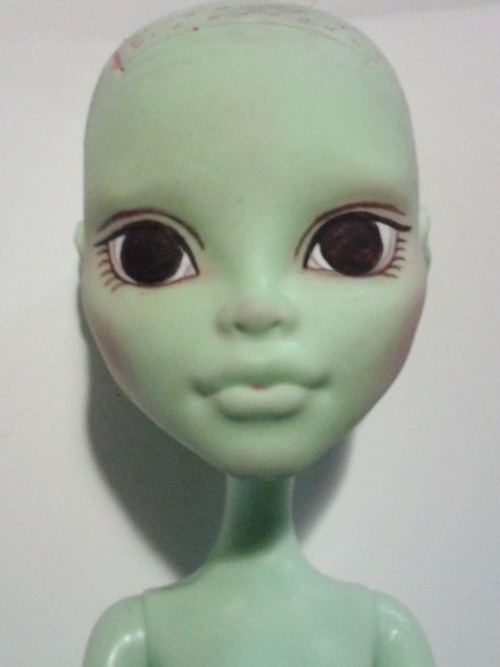
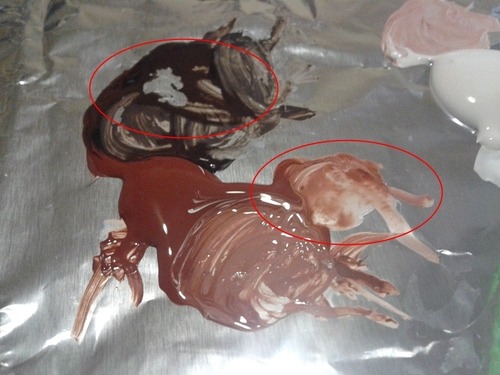
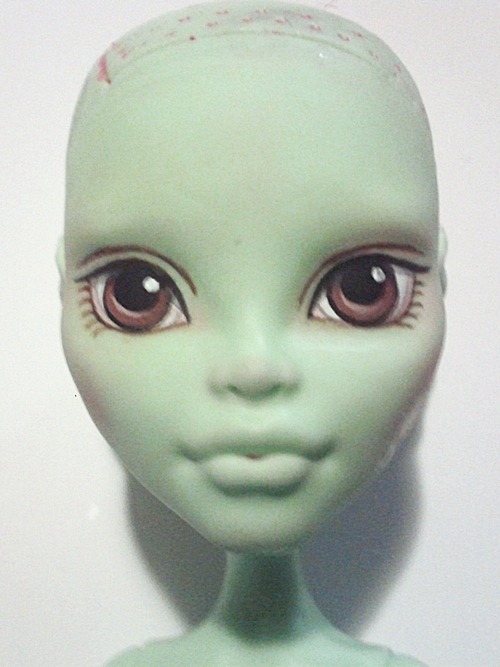
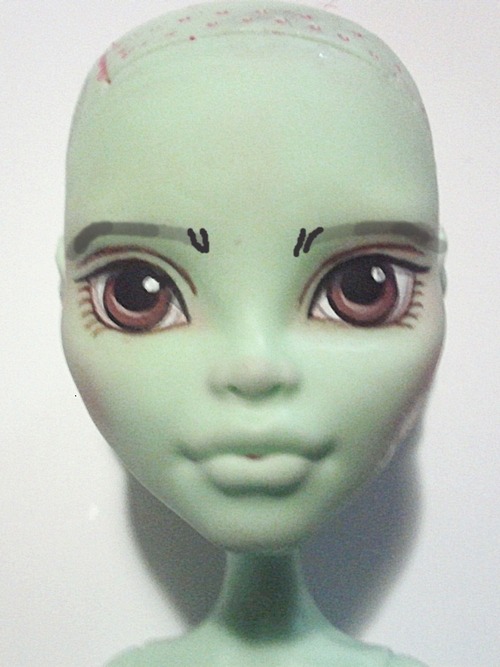
Step 2: I blush my dolls FIRST then paint afterwards as I find pastels get into the paint and it's hard to get it out. These are the shades I used with my pastels. For a more fantasy coloured doll that you don't want pink tones on, something that matches the skin tone for the beige colours and the colour of what you want the blush to be for the pinks.

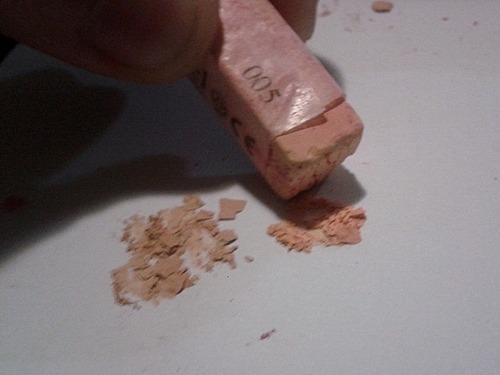
To start with, crush the pastels into a fine dust by grinding the tip into the paper. If it breaks off unevenly, crush with a toothpick. Some people have trouble with this so if you are, rub the pastel on some coarse sandpaper, as this makes it easier to turn it into dust.


Image


Image


Step 3: I usually mix my pastels to give a variance of colour. This always seem nicer than using the pastel straight, but it's not required to mix them.

Image
User avatar
Kd_Bunchanumbers
the walls have dolliehs
 
Posts: 806
Joined: Thu Mar 25, 2010 3:32 pm
Location: Australia


Re: A face up tutorial from me.

Postby Kd_Bunchanumbers » Tue Jul 09, 2013 10:05 am

Step 4: I usually try to blush the more beige colours around the eyes and pink colours on extremities, but I have trouble explaining it so have a chart:

Image


This is just a very simplified chart but it should be handy in localising your colours.

Here is how my doll ultimately turned out, the colours looking more subtle and soft. I blend the colours using a tissue or Q-tip.

Image


I would seal the face at this point. If the colours seem too flat for you, you can always build up the colours by blushing more on after sealing, and repeat until it's to your taste.

Step 5: It's time to start painting. I water my paints down until it's the consistency of cream, as this help with applying it smoother and I could always add more if it's too thin without making brushstrokes too obvious. But if you use it as is, it gives you less control of the paint, brushstrokes will be more obvious and will chip badly.

Image
User avatar
Kd_Bunchanumbers
the walls have dolliehs
 
Posts: 806
Joined: Thu Mar 25, 2010 3:32 pm
Location: Australia


Re: A face up tutorial from me.

Postby Kd_Bunchanumbers » Tue Jul 09, 2013 10:06 am

Step 6: Paint in the whites of your eyes. This will take several layers to get a smooth, solid looking colour in. As I said before, a more expensive paint will only take two-three layers, but a cheaper one will be closer to 5-7.

1 Layer:

Image

3 layers:

Image


This will involve picking a shape that will suit your tastes, and don't be afraid to push the limits of your doll sculpt. I chose to use the eye sculpt as my guide cuz I really liked the shape but here are some other ways I could have painted the sculpt:

Image

Painting the lower half of your eye sculpt will result in a heavy lidded look, perfect for sultry, sad or tired looking characters.

Image


A rounder eye shape makes for a more youthful looking, cartoony look.

Image


Painting in the upper half of the eyelid makes the doll look happy, squinty or constipated.

Just remember, the hardest part of this step is deciding the eyeshape and getting both sides to match. To help me, I scrape any mistakes off with a fingernail, toothpick or a corner of a damp paper towel rolled up really tiny. After that, painting the layers will be so easy.

Tips: If you have trouble with eye shape, use a white watercolour pencil to draw in your eye shapes, and after your paint has dried, GENTLY wipe off the watercolour paint using a damp paper towel.
User avatar
Kd_Bunchanumbers
the walls have dolliehs
 
Posts: 806
Joined: Thu Mar 25, 2010 3:32 pm
Location: Australia


Re: A face up tutorial from me.

Postby Kd_Bunchanumbers » Tue Jul 09, 2013 10:07 am

Step 7: Outline your eye shape using a watered down brown colour (I use Burnt Sienna) as well as any eyelashes and eye creases. This would usually match your doll's skintone, so if your doll base is fantasy coloured, go for a slightly darker shade of your doll's skin tone. I usually avoid doing the upper lashes as my lash points suck and I envy anyone who can paint perfectly pointy lashes. The lower lashes often help the eyes look bigger so I usually add them in begrudgingly. 

Image

If you suck as painting lashes in general, you could easily shade the area where the lower lashes would go with a solid line, with either a slightly lighter shade of paint or a even more thinned down paint shade as the eye liner:

Image


Step 8: This is a completely stylistic choice which can be skipped if you have trouble with thin lines, Skip to step 10.

I paint the lower eyelid and the corner of the eye with a link shade of pink. Since I suck I painted them in digitally to demonstrate rather than taking a photo.

Image

Step 9: Outline the pink areas with a light grey to help define the shape. If you're not steady with ultra thin lines, wait for the grey paint to dry then  edit the lines thinner using white paint. If you painted the whites to a decent amount, then these edits won't show up on the eye whites as high lights

Image

Step 10: Paint in your pupils, by mixing the darkest shade of the eye colour you want. As a rule of thumb, the pupil should be a 'U' shape sitting comfortably on the upper eyelid as opposed to a perfect circle.

For bigger head dolls like Monster High and such, if you want to avoid a fish eyed look with a center stare, always aim to make the doll slightly cross eyed as the bigger stylised features tend to push the eyes in opposite directions and painting them to sit perfectly center will result in a doll whose eyes don't match.

Otherwise if you're not confident in making the eyes look in the same direction, go for a side glancing look as you don't need to be symmetrical with that and there's a lot more room for error.

This will take 2-3 layers.

Image
User avatar
Kd_Bunchanumbers
the walls have dolliehs
 
Posts: 806
Joined: Thu Mar 25, 2010 3:32 pm
Location: Australia


Re: A face up tutorial from me.

Postby Kd_Bunchanumbers » Tue Jul 09, 2013 10:07 am

Step 11: As the iris is drying, go over the eyelash lines with black paint for the upper eyelid (or at least a darker brown than your lower lashes) and a darker brown for the lower lashes and eye crease. (I also painted both irises to match)

Image

Step 12: Mix two to three shades of you desired eye colour ranging from mid range of your tone and the lightest eye colour you want. Do NOT let these completely dry as you put it on.

Image


I paint these in shading order to help the eyes have depth. I then try to blend the colours into a nice gradient.

Image

This is achieved by gently blending my colours together, however if your paints dry too quickly, water down your paints to the consistency of coloured water to help blend the colours. Let the layers dry.

Image


Step 13: Carefully paint in the pupils using black. These should at least be touching the upper eyelid and be equal size unless your doll has head trauma, or some other specified reason to have unequal pupils. This may take several layers depending on how much pigment it has.

Also I usually paint in a very thin layer of black paint in the upper eye to give it more shading.

Image


Step 14: Paint in your eyes' light reflections. I tend to not put in large amounts unless my character is crying, has huge anime style eyes or some other specified reason. I find that it looks too messy if the whites are too big or too many so use this sparingly. Also I mixed a white-brown colour and outlined the edge of my pupil to give it some depth.

Image
User avatar
Kd_Bunchanumbers
the walls have dolliehs
 
Posts: 806
Joined: Thu Mar 25, 2010 3:32 pm
Location: Australia


Re: A face up tutorial from me.

Postby Kd_Bunchanumbers » Tue Jul 09, 2013 10:09 am

Step 15: Painting the eyebrows is one of the most trickiest parts, which is why I usually leave it to last as if I mess up the eyebrows, it'll be easier to clean than if I do perfect eyebrows and do a really bad job on the eyes themselves. For those having trouble with eyebrows, draw in the basic shade with a white watercolour pencil, then after ALL of the eyebrow paint has dried, gently wipe off with a damp paper towel.

Picking an eyebrow shape can DRASTICALLY alter your doll's expression so definitely think hard on this one. I crappily edited in some other looks I sometimes go for.

Image

Image

Image

Image

Image


If you want to be fancy, I usually avoid doing actual eyebrow hairs except for the ones near the ends in the middle for really thick eyebrows. To shade them, I would paint them lighter in the middle and darker towards the sides usually VERY thin layers of paint to build them up.

Image
User avatar
Kd_Bunchanumbers
the walls have dolliehs
 
Posts: 806
Joined: Thu Mar 25, 2010 3:32 pm
Location: Australia


Re: A face up tutorial from me.

Postby Kd_Bunchanumbers » Tue Jul 09, 2013 10:10 am

Step 16: For the lips, I usually paint in the creases of the lips to help give them more depth and depending on your sculpt make the lips look more like they're smiling if painted upwards or sadder/angrier if slightly downwards. This also helps define your lips a bit more especially if you blush in the lips with pastels.. I do this first as it helps blend the lines in better with the lips and doesn't look so tacked on.

Image

Step 17: Carefully paint in your lip shapes. Again if you have trouble with shapes, draw it in carefully with a white watercolour pencil and wipe off with a damp paper towel after the paint has fully dried.

This usually has several layers of paints. Remember that the upper lip is usually darker than the lower lip and there's more colour saturation in the middle of the lip than the other corners.

Image


Then you spray seal everything, gloss the eyes and lips, and you're done.

I really hope you enjoyed my tutorial!

Image
User avatar
Kd_Bunchanumbers
the walls have dolliehs
 
Posts: 806
Joined: Thu Mar 25, 2010 3:32 pm
Location: Australia


Re: A face up tutorial from me.

Postby Stormlight » Tue Jul 09, 2013 10:45 am

Awesome! If I ever get the courage to paint my own faces, I'll definitely use this as a guide. Thanks for taking the time to post this.
User avatar
Stormlight
Dolliehs Consume My Brains
 
Posts: 1296
Joined: Wed Apr 14, 2010 8:19 pm
Location: In Fairyland's Diabolical Clutches


Re: A face up tutorial from me.

Postby zirconmermaid » Tue Jul 09, 2013 12:58 pm

Thank you! I always love your faceups!
It's all about Hazel!
Image

"Space.... the Vinyl Frontier. These are the voyages of the Starship Obitsurprise. Her 1/3rd scale mission: To seek out new plotlines, to explore the Whole Apartment - To Ball-Jointedly go where no doll has gone before!" -- Swan

Avatar by Meredith Dillman, http://www.meredithdillman.com
User avatar
zirconmermaid
It's all about Hazel
 
Posts: 3316
Joined: Sat Mar 20, 2010 6:28 pm
Location: Hazel's House, in Minnesota


Re: A face up tutorial from me.

Postby mica » Tue Jul 09, 2013 5:34 pm

That was great!
I like that you show the actual pastels and paint colors & mixing them-
Also the way different shapes look of eyes & brows-
what a Great tutorial!!
Kerryth- Delilah Noir Dark and Defiant
Anakin- Goodreau Schemer
Robin- Impdoll Bobo
Willow- Hujoo Suve........Bran- Hujoo Suve
Atrus- Domuya Venturo......Miriana- Delf EL
Riven- Dollzone Yuu
User avatar
mica
I snort dolliehs liek candi
 
Posts: 510
Joined: Sat Mar 31, 2012 3:14 pm
Location: New England,USA

Next

Return to Board index

Return to Tutorials

Who is online

Users browsing this forum: No registered users and 10 guests