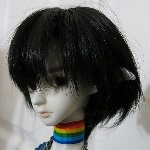
My Home made 60cm BJD progress!!
30 posts
• Page 3 of 3 • 1, 2, 3
Re: My Home made 60cm BJD progress!!
I also want to make my own bjd some time! I love reading about it. Zirconmermaid, are your husband's projects shown on this board or anywhere else? I'm curious!! (Found your website, but there was no content under your husband's name.)
Last edited by Rosinha on Thu Jan 03, 2013 8:51 am, edited 1 time in total.
- Rosinha
- Dolliehs? WHERE???
- Posts: 30
- Joined: Mon Dec 31, 2012 2:45 pm
- Location: The Netherlands
Re: My Home made 60cm BJD progress!!
Kim, have you thought about going the silicon and resin route? Sterling Supply is the place that I get my silicon and resin from. They've decent prices, and are real sweethearts to work with. They even changed up their shipping practices to allow me to remain a customer! They used to only send things out UPS, which for me is insanely expensive; when it came time for my second order, we were talking about the shipping and USPS Parcel Post was suggested as an alternate shipping method for me... so far it's worked like a charm! A little slower, but at least I'm not paying triple digits in shipping to get my supplies anymore. ^____^
The tin-cure silicon (just ask for the blue one) is around $100 a gallon, and white alumilite resin is about $115 for a two gallon kit. I normally get an extra bottle of silicon activator, since I tend to put in 15% instead of the 10% that it's supposed to take. Putting in extra activator makes the silicon set up a little quicker, though even then it takes upwards of 5-10hrs to cure.
If you've a pressure pot, pop the curing mold into the pot under 40psi for it's cure time (I'll usually leave it over night). Pressurizing the mold works just as well as degassing it in a vacuum chamber, and allows you to keep less equipment on hand. Once the mold is finished, pour in the resin, and pop that puppy back into the pressure pot for a pressurized resin casting. ^___^
Word of advice, never pressure cast in a non-pressurized or non-degassed mold. The resin piece will come out with random little spikes all over it! XD
- kiki-chan78
- I snort dolliehs liek candi
- Posts: 488
- Joined: Mon Apr 05, 2010 6:56 pm
Re: My Home made 60cm BJD progress!!
I am no where near ready to cast yet. I'm still working out the joints on my prototypes. I do have a small casting kit, mold putty, paint on mold building rubber, and a few other low end things to play with when I'm ready.
-

DollyKim - Dr. Dollittle
- Posts: 7632
- Joined: Sat Mar 20, 2010 3:07 pm
- Location: At the base of Mt Baldy
Re: My Home made 60cm BJD progress!!
This doll is obviously not 60cm, but the tutorial is useful, I think, for basic method: http://morezmore.com/myblog/2010/10/29/ ... cs-part-4/
- EAB
- Dolliehs Consume My Brains
- Posts: 1228
- Joined: Thu Jan 27, 2011 8:27 am
- Location: New York City
Re: My Home made 60cm BJD progress!!
I've been there, I think her doll is on the smaller side and that's why it works.
So, how is the original poster's doll going? Any progress pics yet?
So, how is the original poster's doll going? Any progress pics yet?
-

DollyKim - Dr. Dollittle
- Posts: 7632
- Joined: Sat Mar 20, 2010 3:07 pm
- Location: At the base of Mt Baldy
Re: My Home made 60cm BJD progress!!
kim i've steered away from some of my original plan but here's wat i've managed to get to as far as progress: i did get some air dry clay a while back b4 i started this project but never thought to use it so now my plan is use it for the head, the body & the joints, as for the limbs i've decided to use a super sculpey brand of clay used specifically for making dolls. i plan to paint the other parts of the doll to match the color of this clay, tho the head has taken a back seat while i focus on the rest of the doll as the head cap i think was sanded down a lil too much & i dont plan to constantly switch out the eyes, so until i CAN find a hobby store in my area that carries various sizes of doll eyes the head will end up being the last item on my to-do list cuz once the eyes are in i need to "glue" the head cap back on w/ more air dry clay & then sand that down after it dries. plus i've got more items on the "to-do list" for the body joints & limbs, so i'll be focusing more on those then put in some extra hrs to fix up the head & head cap & then paint & get his "permanent" wig made, then string him all together! i did manage to start working on his body a lil bit tho its finished drying so i was able to sand it down somewhat w/out it being a lil too much like w/ his head, lol! i plan to start working on the limbs & the joints next! i dont know how to post pictures on here so i'll be posting them on my facebook fan page i made for all my arts & crafts projects its called: Lauren's Art Extravaganza, be sure to look it up if u wanna see any progress photos as i work on him more.  thanks to all for the helpful tips & advice it really helps me out a bunch! please dont hesitate to post any other tips or friendly advice on here it makes everything i've done with this project so much more fun & worthwhile! thanks again!
- vkgirl911
- Dolliehs? WHERE???
- Posts: 12
- Joined: Tue Aug 14, 2012 12:04 pm
Re: My Home made 60cm BJD progress!!
Here's a sneaky trick to make that headcap both removable and magnetic on a budget! Buy two sets of magnetic necklace clasps and use them. I did this with the head my husband made me years ago. It's sculpey and way too fragile for any sort of drilling. So I just glued the clasps to the inside and it worked out great. Also - unless the doll will be bald, a perfectly smooth headcap can help keep a wig on. Old Dollzone heads deliberately have a headcap larger than the head for just that reason.
It's all about Hazel!

"Space.... the Vinyl Frontier. These are the voyages of the Starship Obitsurprise. Her 1/3rd scale mission: To seek out new plotlines, to explore the Whole Apartment - To Ball-Jointedly go where no doll has gone before!" -- Swan
Avatar by Meredith Dillman, http://www.meredithdillman.com

"Space.... the Vinyl Frontier. These are the voyages of the Starship Obitsurprise. Her 1/3rd scale mission: To seek out new plotlines, to explore the Whole Apartment - To Ball-Jointedly go where no doll has gone before!" -- Swan
Avatar by Meredith Dillman, http://www.meredithdillman.com
-

zirconmermaid - It's all about Hazel
- Posts: 3316
- Joined: Sat Mar 20, 2010 6:28 pm
- Location: Hazel's House, in Minnesota
Re: My Home made 60cm BJD progress!!
Oooh, that looks really neat so far! He has a gorgeous jawline and those cheekbones are spectacular. What brand of air-dry clay are you using?
If the mods on my eventual boy Corbin go smoothly enough, my mom and I are going to work on an MSD-sized BJD from scratch. Mom did polymer clay jewelry when it was first a big thing and I have experience with it, too. If you have any pointers you'd like to mention that you've found out through making this guy, they'd be really helpful.
If the mods on my eventual boy Corbin go smoothly enough, my mom and I are going to work on an MSD-sized BJD from scratch. Mom did polymer clay jewelry when it was first a big thing and I have experience with it, too. If you have any pointers you'd like to mention that you've found out through making this guy, they'd be really helpful.
deviantArt
Flickr
Story blog/Doll blog
At Home: BBB Ariel (Leah) ♠ DZ Hid (Sam) ♠ DZ Mo/AOD (Pen) ♠ RS Fei (Siri) ♠ RS Tang/D-Leaves (Cord) ♠ RS An (Michael)
Flickr
Story blog/Doll blog
At Home: BBB Ariel (Leah) ♠ DZ Hid (Sam) ♠ DZ Mo/AOD (Pen) ♠ RS Fei (Siri) ♠ RS Tang/D-Leaves (Cord) ♠ RS An (Michael)
-

jemlovecraft - Dolly Pardon
- Posts: 257
- Joined: Mon Nov 12, 2012 3:36 pm
- Location: I still don't know.
Re: My Home made 60cm BJD progress!!
You're going to want at least a 1/4" or 1cm thickness to put up with the stress of the stringing. Use armatures in the hands and feet and where ever else you can. Stick to the smaller skinnier end of MSD.
On the "cheap" air dry side Prang DAS and Polyform Model Air are economical and work okay for dolls. I'm working with both right now on my practice doll and haven't had any problems.
On the "cheap" air dry side Prang DAS and Polyform Model Air are economical and work okay for dolls. I'm working with both right now on my practice doll and haven't had any problems.
-

DollyKim - Dr. Dollittle
- Posts: 7632
- Joined: Sat Mar 20, 2010 3:07 pm
- Location: At the base of Mt Baldy
Re: My Home made 60cm BJD progress!!
To jemlovecraft: that was actually the old version of my doll i've since made his body a little bigger then that & am working on a new head which looks just like the old just on a larger scale, i think w/ my poor judgement in size comparison, i might end up w/ an msd size boy after all is said & done. i've also made his feet & the lower half of both his legs & his forearms. also, the air dry clay i use i think is called, "model air," im not 100% sure i got it at walmart in their art & crafts section. it requires a little bit of water being applied to it before & after each use to keep it from drying out & becoming as hard as a rock. but its a great starter clay. at least in my opinion it is. i've used it as a core for the body too! worked out wonderfully! i heard somewhere's not sure if it was on this website or another site but, i heard that using a glue & water mix is a great way to aid in protecting a doll against breaks & cracks so i might try some of that to further protect my boy from getting damaged. i'll be taking more progress pics as time goes on but i might not be able to upload them until after he is finished as "Dante" is taking up most of my spare "crafting" time so it could take a while before i get a chance to upload anymore photos of him but i'll make sure to include a date stamp in my photos so everyone knows when the progress in the images was made.
- vkgirl911
- Dolliehs? WHERE???
- Posts: 12
- Joined: Tue Aug 14, 2012 12:04 pm
30 posts
• Page 3 of 3 • 1, 2, 3
Who is online
Users browsing this forum: No registered users and 3 guests
